What Is Concrete Slump? How Is It Measured? (EN 12350-2 / ASTM C143)
- What does slump indicate?
Slump is a simple field test used to quickly assess the consistence / workability of fresh concrete. It indirectly reflects how readily concrete will place, flow/deform, and—often in practice—whether the water–admixture balance is reasonable.
Important: Slump is not a strength test. Two concretes with the same slump can have different compressive strengths; slump is mainly a consistence check.
- Why is slump critical?
Slump testing is typically used to:
Verify batch-to-batch uniformity (does the same mix deliver similar consistence each time?).
Detect issues early such as excess water addition, incorrect admixture dosage, or aggregate moisture variations.
Confirm that the concrete is suitable for the intended placement conditions (pump, bucket, vibration, congestion of reinforcement, etc.).
- Main factors affecting slump
The biggest drivers of slump are:
Water content and effective water/cement ratio
Chemical admixtures (especially superplasticizers) and their on-site “effect time”
Aggregate moisture (sand moisture, surface moisture) and gradation
Temperature and waiting time (slump may drop during transit)
Mixing energy/time
- Slump test equipment
Slump cone (Abrams cone): truncated conical metal mold
Base plate (flat, non-absorbent surface)
Tamping rod
Ruler/measuring device
Common cone dimensions are 300 mm height, 200 mm bottom diameter, 100 mm top diameter.
- How is the slump test performed? (summary)
The method is defined in EN 12350-2 (often adopted nationally) and ASTM C143/C143M in the USA.
Place the base plate on a flat, non-absorbent surface; secure the cone.
Fill the cone in 3 equal layers.
Rod each layer 25 times (evenly distributed).
Strike off/level the top surface.
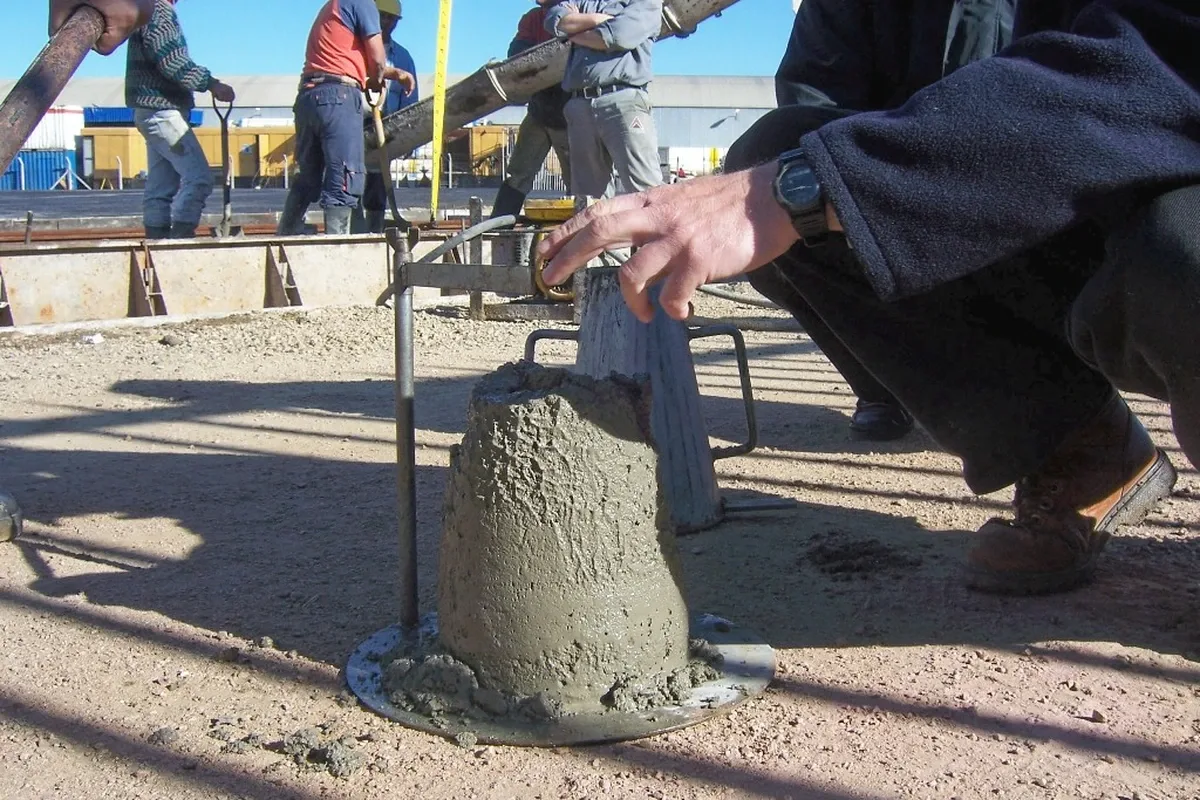
Lift the cone vertically without twisting.
After the concrete subsides, measure slump in mm using the cone’s top level as reference.
- How is slump read?
Principle: measure the vertical difference between the reference level (top of the cone) and the highest point of the slumped concrete; report as slump (mm).
Practical field method:
Invert the cone next to the slumped concrete,
Use a straight edge at the cone’s top level as a reference,
Measure the distance to the highest point of the concrete.
- Slump shapes: True / Shear / Collapse
True slump: uniform subsidence; most meaningful result.
Shear slump: part of the mass shears sideways; may indicate cohesion/gradation/fines/admixture–water issues.
Collapse slump: concrete spreads/loses shape; the classic slump test may be unsuitable—other consistence tests may be needed for very fluid mixes.
- Typical slump classes (S1–S4) and practical range
In EN practice (EN 206), common classes are:
S1: 10–40 mm
S2: 50–90 mm
S3: 100–150 mm
S4: 160–210 mm
Also, slump is generally most informative in roughly the 10–210 mm range; outside this range, other tests may be more appropriate.
- Common field mistakes (and impact)
Twisting/pulling the cone sideways while lifting → inaccurate result.
Uneven filling or irregular rodding → poor repeatability.
Sloped/vibrating base → measurement error.
Very large aggregate / inappropriate consistence range → reduced relevance (follow standard limits).
Conclusion
The slump test is one of the most practical tools for rapid consistence control of fresh concrete. With correct equipment, execution, and interpretation, it helps catch water/admixture and aggregate-moisture related deviations early—supporting quality and cost control.